How to Complete the Mailboxes Request Form in AiSDR
Last updated: October 9, 2026
When you log in to AiSDR for the first time, you will see a pop-up onboarding guide on the left-hand side of the platform. This includes five “Get started” steps to help you set everything up smoothly.
The first and most important step is “Request new mailboxes”. Here’s a simple walkthrough to guide you through the process:
Important: Once you submit your mailbox request and setup begins, the domains and mailboxes cannot be changed. Please double-check all names, domains, and preferences before submitting the form.
✅ Step 1: Open the Mailbox Request Form
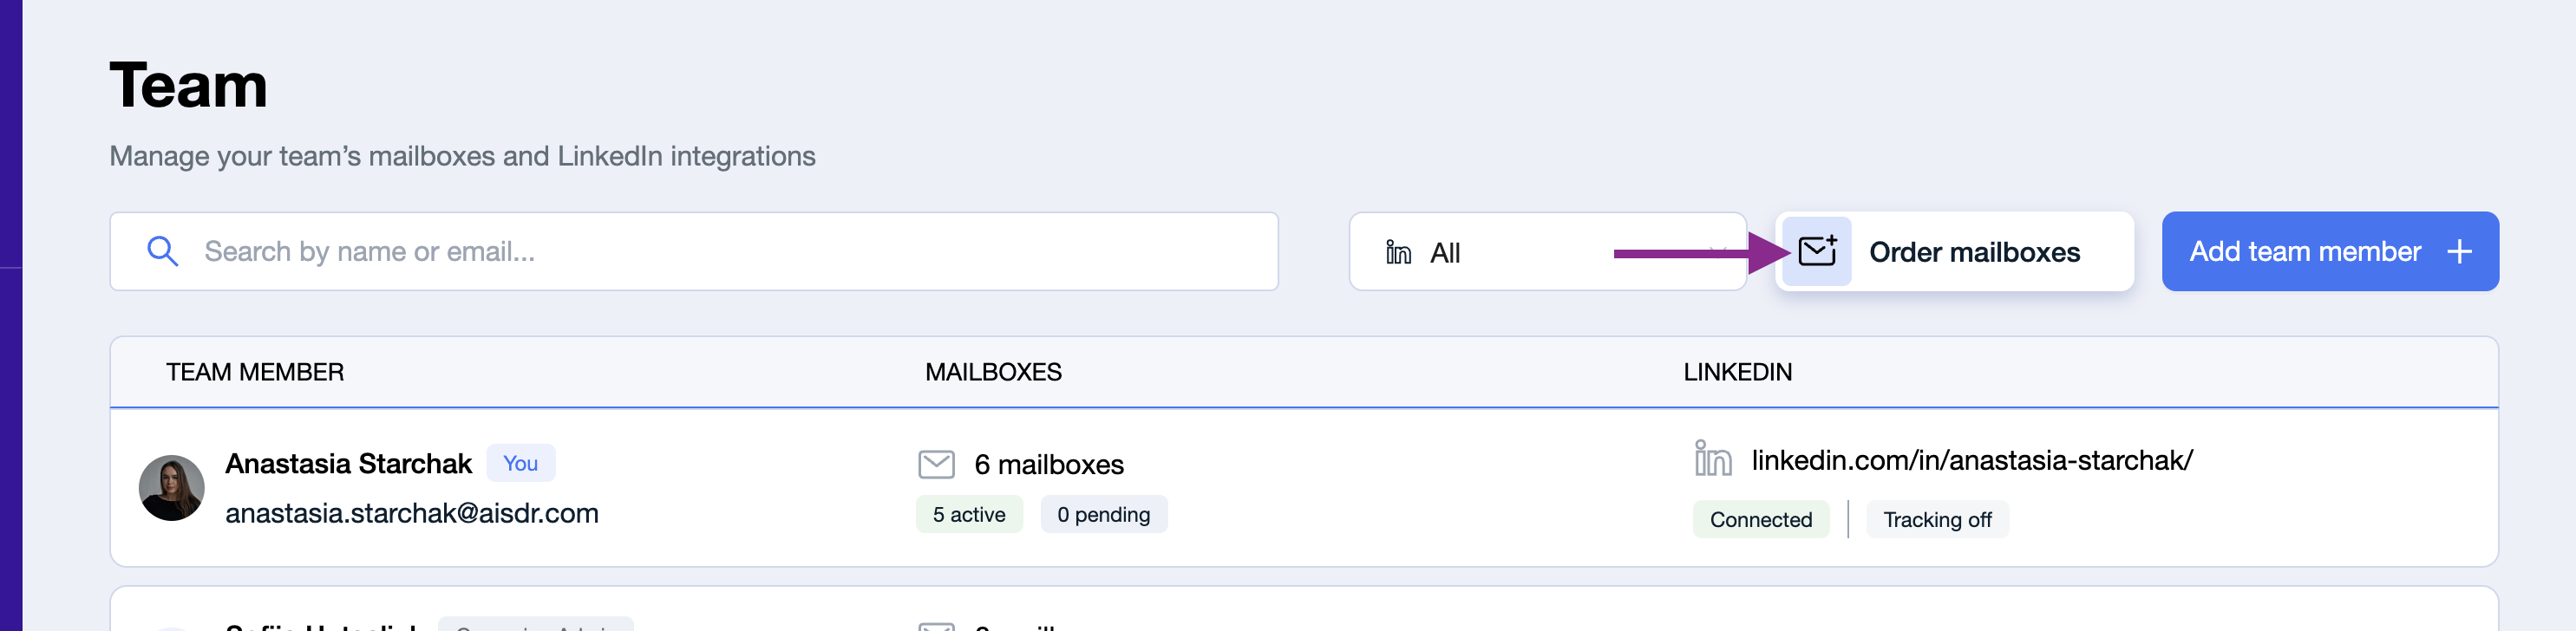
Go to Team tab > Order Mailboxes. This will open a form that allows you to request the domains and mailboxes needed for outreach.
🌐 Step 2: Select the Domains
Based on your website, AiSDR will suggest several domain options for outreach. These alternative domains will be used for email sending to ensure better deliverability.
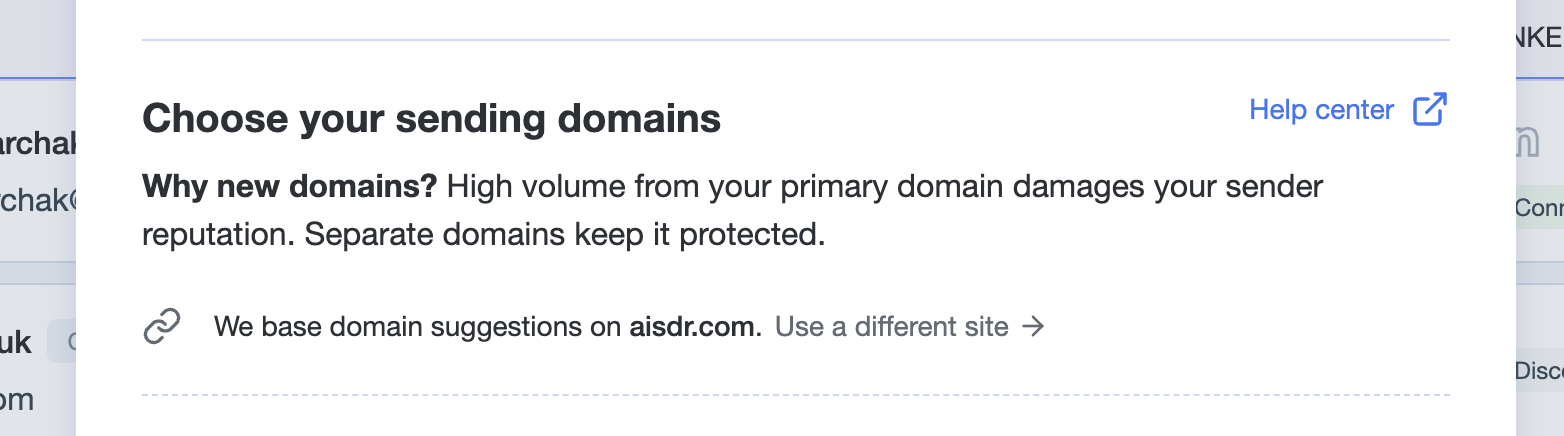
If your main domain isn't a .com, no worries - we only use it to generate suggestions for your lookalike domains.
Choose the domains you'd like to request. The suggested amount depends on your subscription plan - higher-tier plans come with more email credits, and therefore require more domains to cover your monthly sending volume.
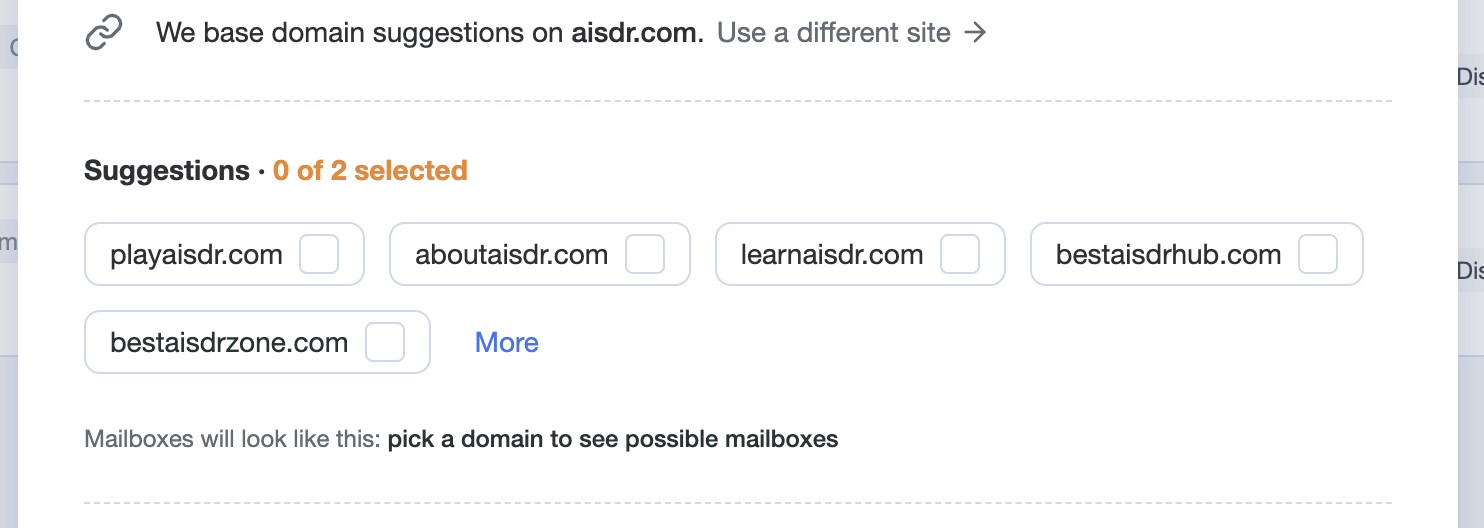
Pick domains that look like your main brand (e.g., aisdrpro.com, tryaisdr.com). Always go for .com - it’s the most trusted. Keep domains short and simple -they look more professional and are less likely to trigger spam filters.
🔗 Step 3: Add the Destination URL
This is the URL that your alternative domains will redirect to, so they look credible and connected to your brand. Simply paste your main website URL there.

Click Next to move to the sender setup section.
➡ Step 4: Invite your Team
Here, you’ll see everyone who has already been invited to your AiSDR account. If you’d like additional names to appear on the lookalike mailboxes, feel free to invite more senders using Invite teammate.
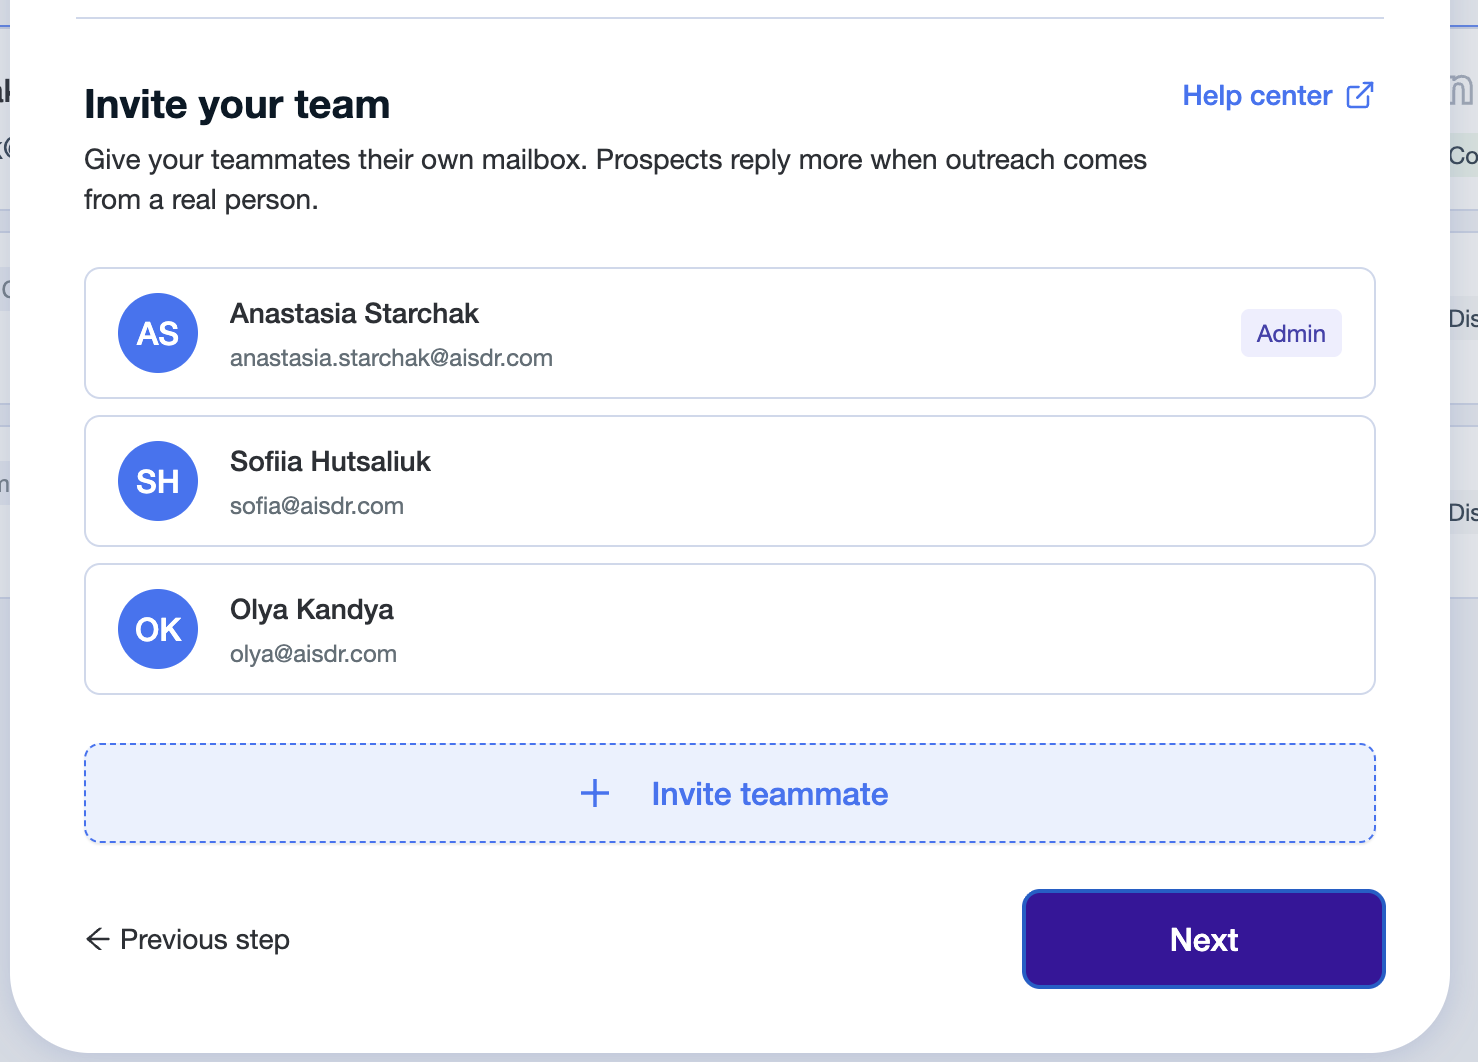
If all the senders are present, just press Next.
➡ Step 5: Add Mailboxes per Sender
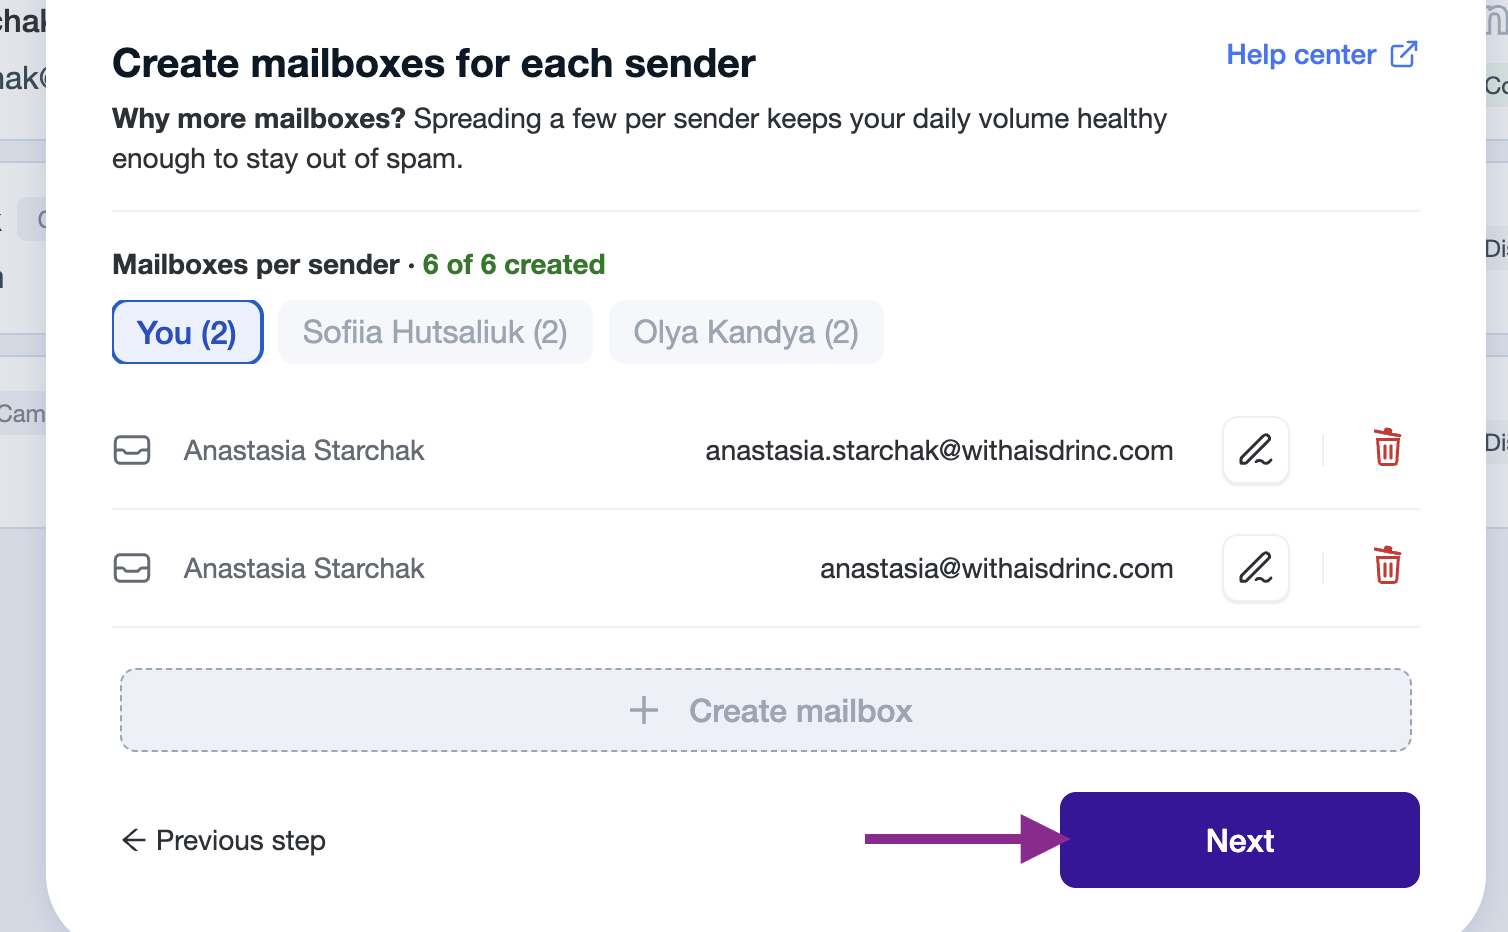
At this point, you need to assign a lookalike mailbox to each person you want to include in the outreach. Feel free to switch between sender names and press Create mailbox.
Note: one domain can have a maximum of 3 mailboxes assigned.
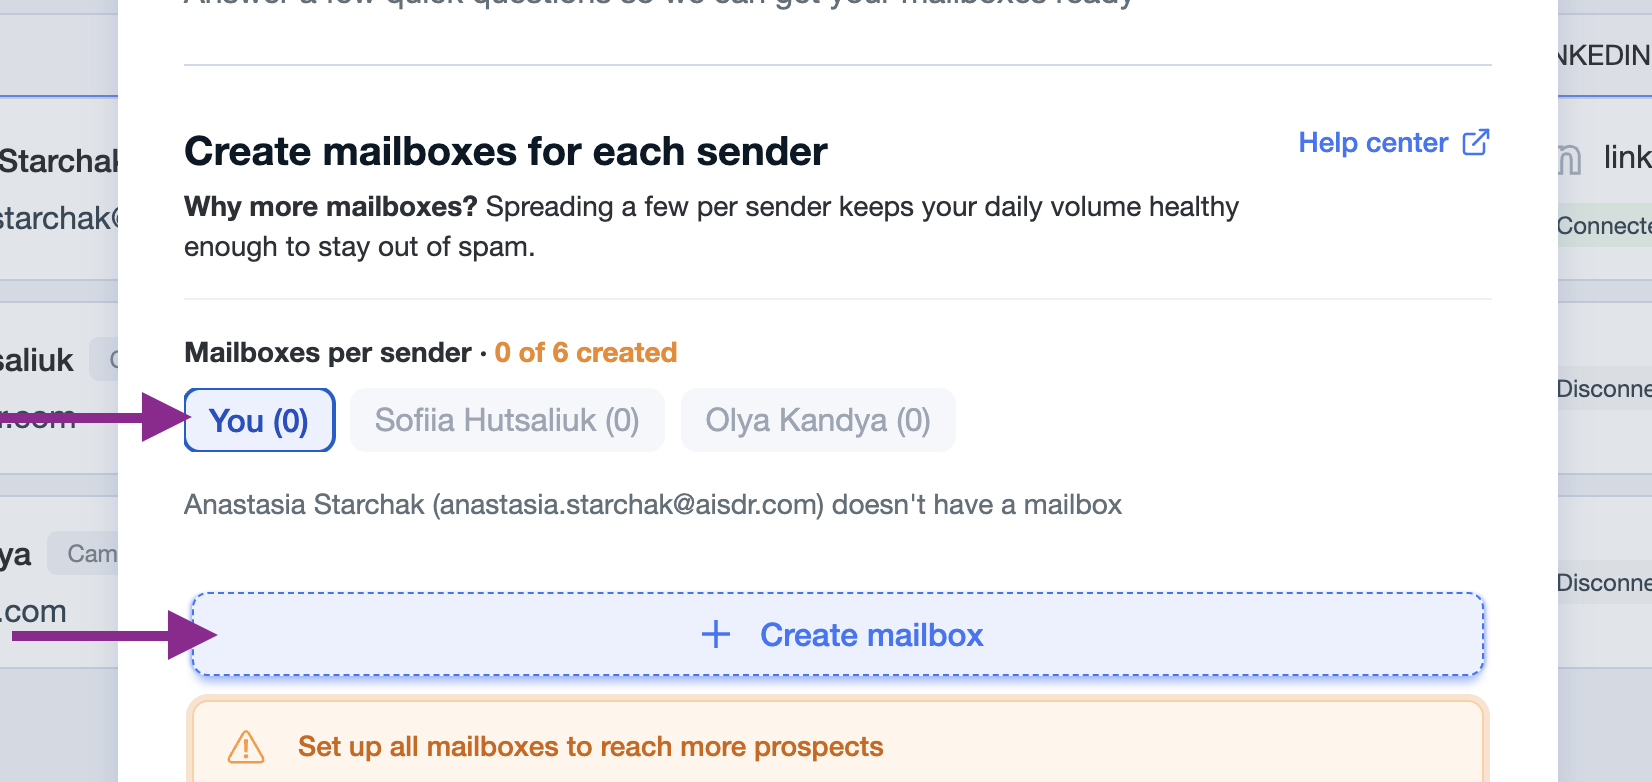
Make sure to pick the right senders.
Choose someone who can connect their LinkedIn to unlock multichannel outreach (email + LinkedIn).
We strongly recommend selecting real team members as senders — recipients trust real names and often check LinkedIn for legitimacy.
Senders do not necessarily need to manage campaign setup themselves. There are two options:
Each rep can manage their own campaigns
You can manage campaigns on their behalf — in this case, only their name and mailbox setup are required. You’ll still have access to their account for full visibility and control.
Once mailboxes are distributed, click Next.
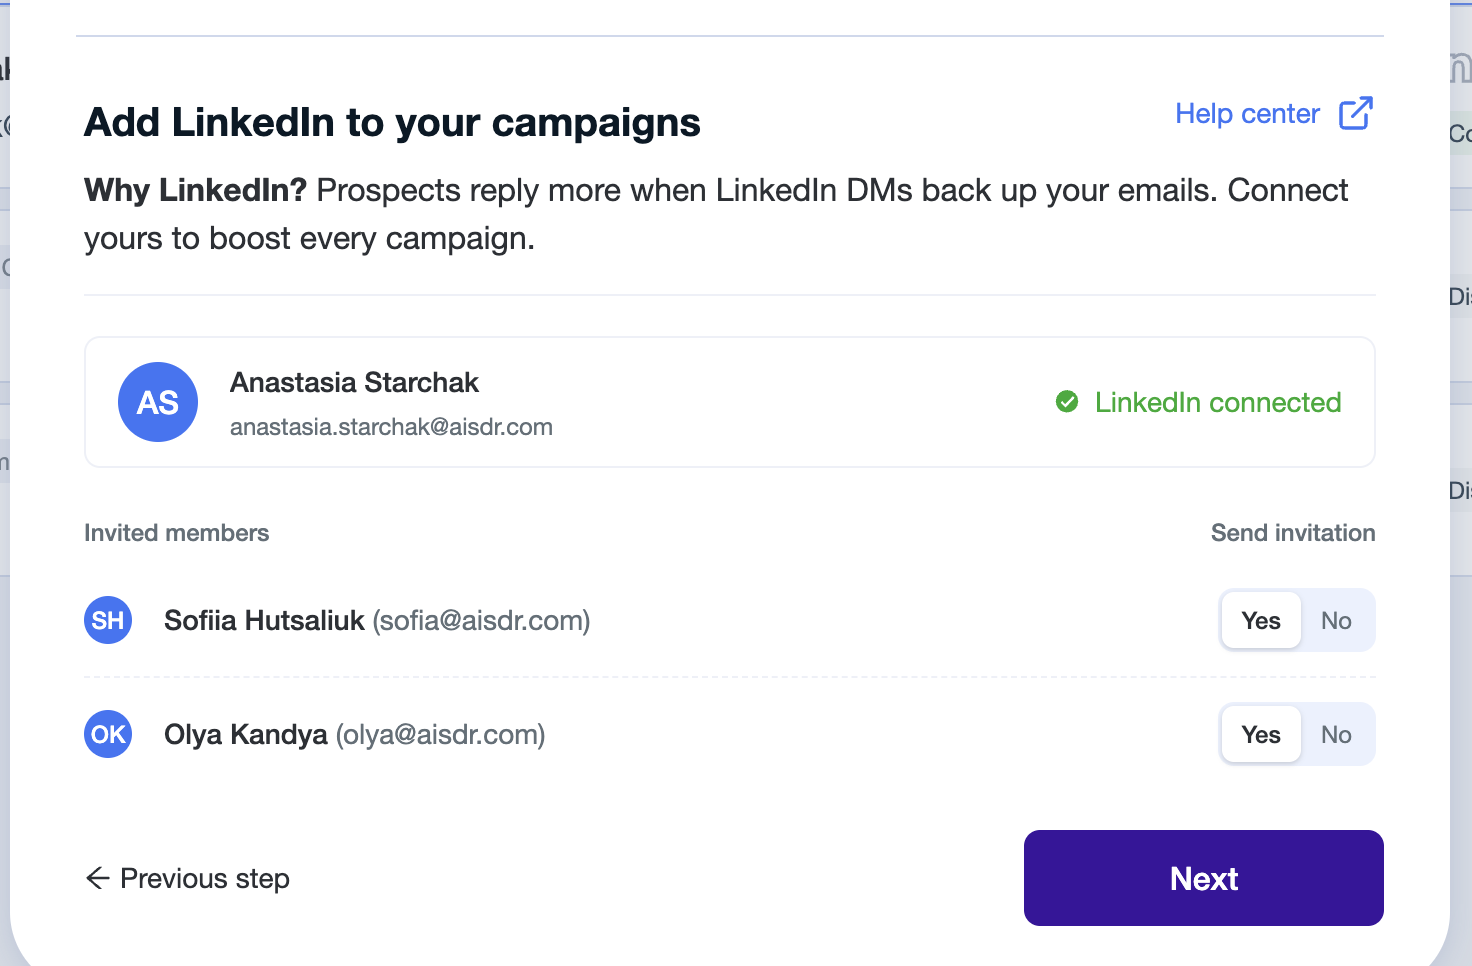
➡ Step 6: (Optional) Add LinkedIns to your account
You can also connect LinkedIn right away at this stage and send invites to connect for your team, or do it later via the Settings tab.
🔧 Step 7: Review and Submit
Once you have filled in all the details, you will see a summary page with your selected settings, requested domains, and sender details. Carefully review all information as these settings cannot be changed after submission.
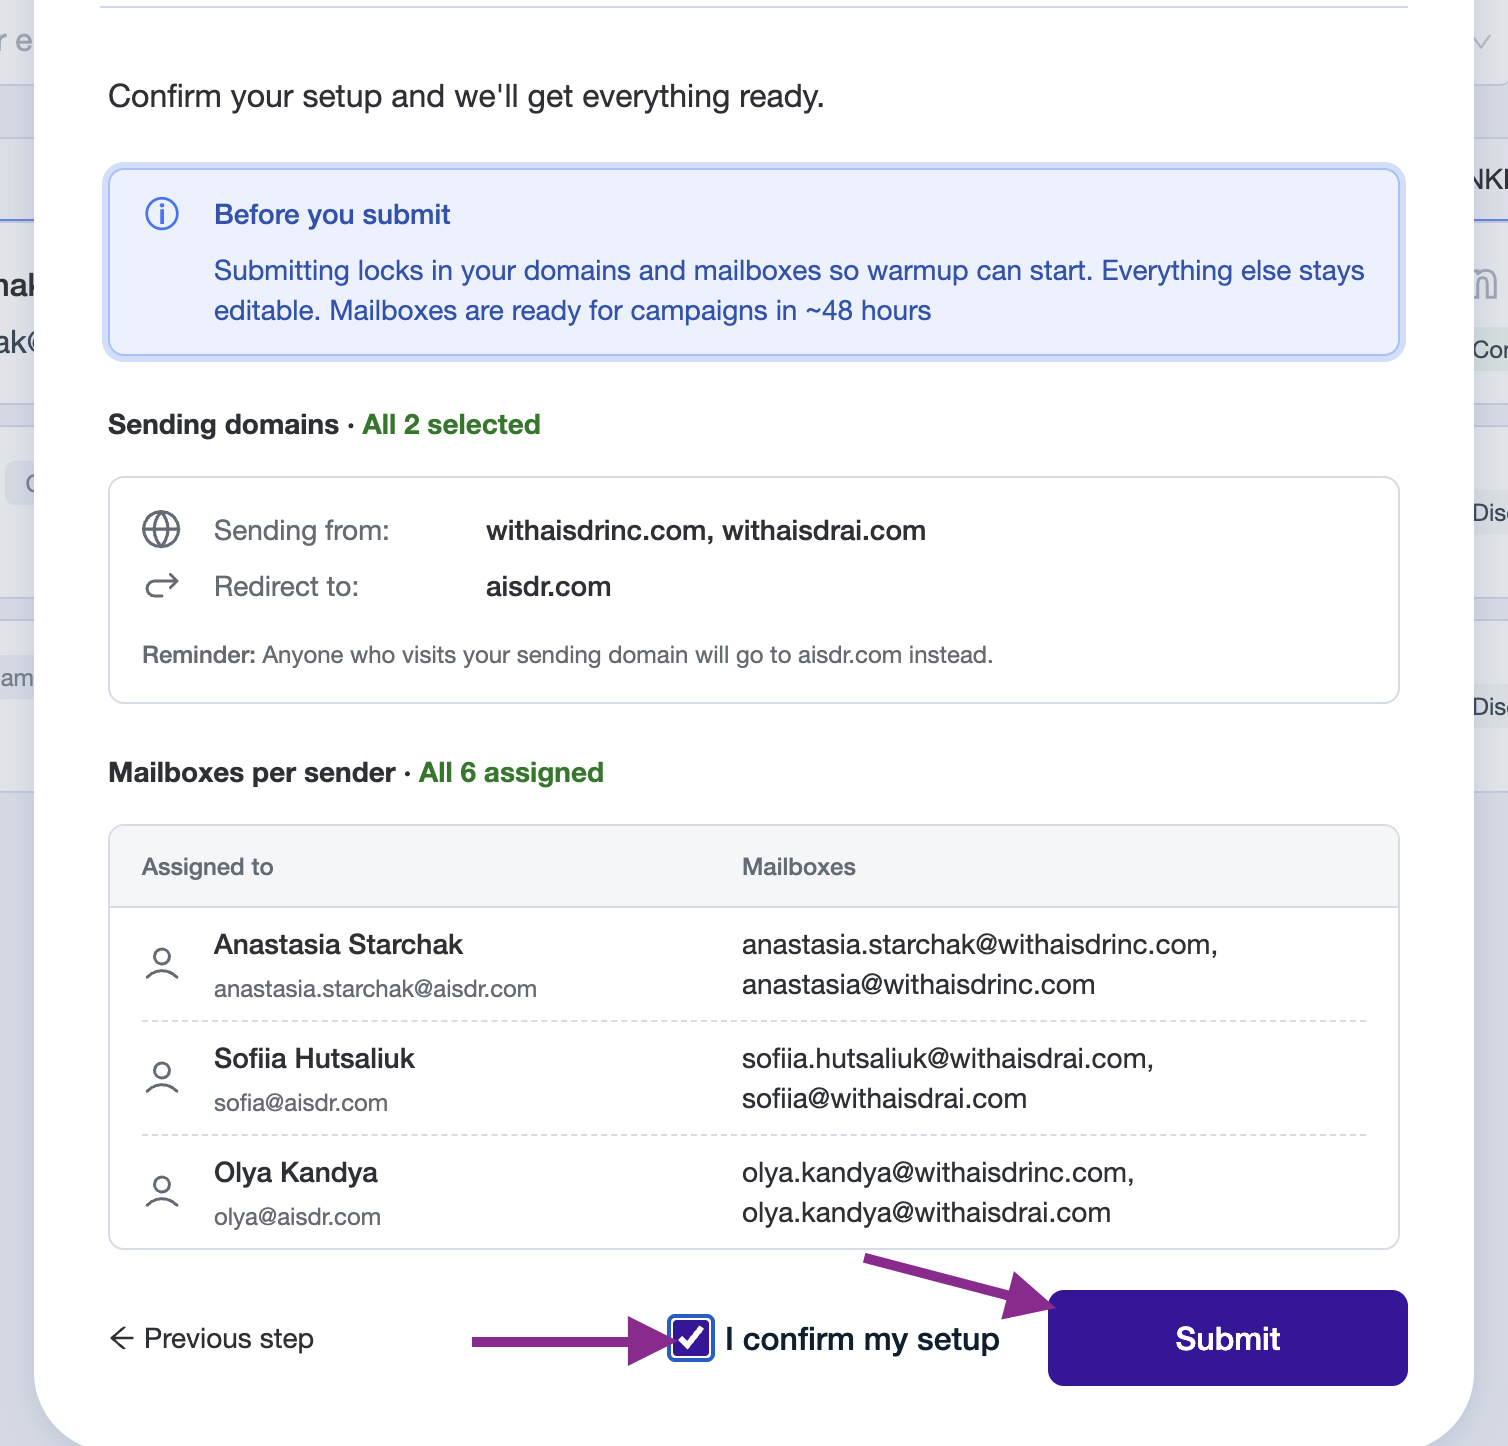
When everything looks good, click “Submit” - and you are done!